Christmas usually means lots of baking and/or crafts, so you may like to have an extra apron or two on hand. This apron is very quick and easy to put together. It can easily be adjusted for different sizes. I’m not use to doing a tutorial for these types of sewing things, but I thought I would give it a try this time.
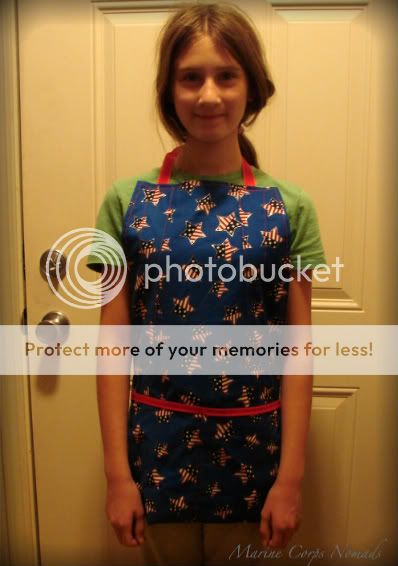
Supplies:
- 2 large cloth napkins (or 2 18X18 pieces of fabric with edges finished)
- thread
- ribbon
Directions:
You’ll want to make sure everything has been washed and ironed. Ironing each step of the process will end in a better finished result with the apron.
Step One:
Since this step is personalized for the recipient of the apron, you’ll need to measure across the person’s chest (or hold up the napkin to see what size the top of the apron will need to be). You’ll be pleating the fabric (one pleat on the left and one on the right) in order to achieve the desired width. The pleats will be larger at the top and taper down to virtually no pleats at the bottom. Pin the top of the pleats in place and iron the pleat.
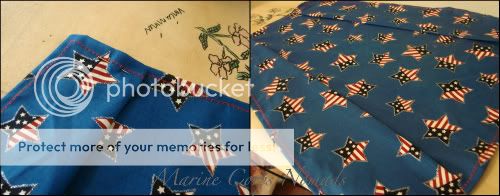
Step Two:
Stitch down the front of each of the pleats. You’ll want to stitch close to the edges. Now, you’ll want to flip over the fabric and stitch down the other side of the pleats. Once again, try to stitch close to the edges of the pleats.
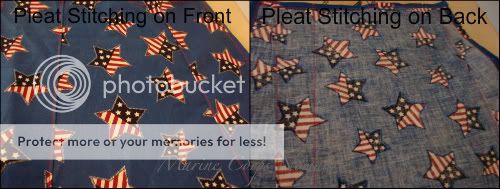
Step Three:
Take the second napkin and fold it in half with the wrong sides together. Iron the fold. If desired, add contrasting bias tape to the top of one side of the napkin and stitch in place.

Step Four:
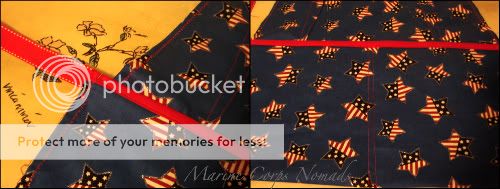
Once again, you’ll need to do a little measuring to find the proper size/placement for the bottom portion of the apron. You’ll hold up the pieces to see how long you want the apron to be. Pin the wrong sides of the two pieces of the apron together and pin according to you desired length. (This will be the back of the apron and the top of the back portion of the pocket – see picture.) Stitch pieces together.
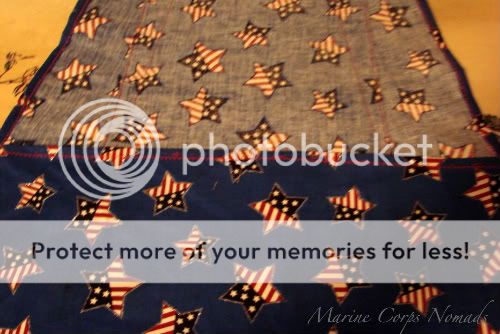
Step Five:
Now, you’ll be creating the pockets. First, you’ll be creating one big pocket. With the right side of the apron facing you, flip up the bottom portion of the square to create a big pocket. Add the ribbon ties between the two layers and stitch up the sides. Make sure you double/triple stitch the area where the the ribbon it attached. Next, you’ll be stitching down the center of the big pocket to create 2 pockets.
Step Six:
The final step is adding the neck ties. Just take two pieces of ribbon and attach them to the top of the apron. Placement will vary according to taste. (I just slipped them into the “pockets” created when making the pleats.) Make sure you double/triple stitch the area where the ribbon is attached.
Variations:
If you make your own napkins, you can make the ties out of the same fabric. The ties can be thick or thin according to your taste.

Thanks for posting this. I’ll probably be coming back if I can get all the items I need (or find some free fabric over at my grandmother-in-law’s.)
Kellyann W. recently posted..2010 Holiday Bliss – Dec 6