
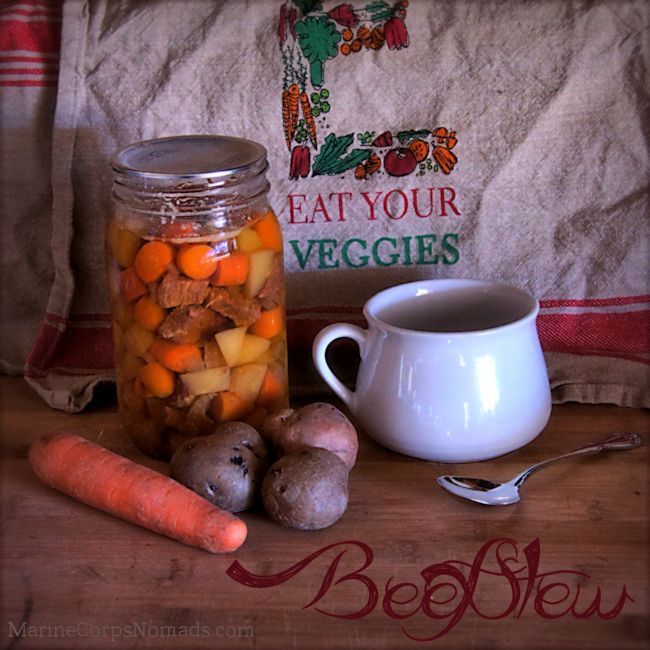
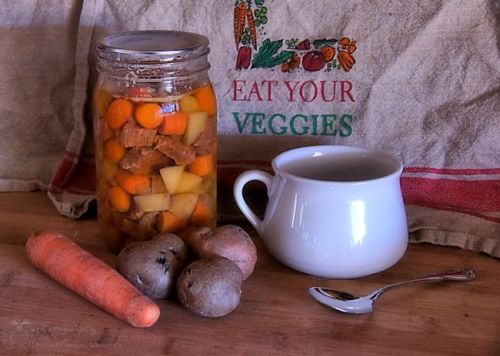
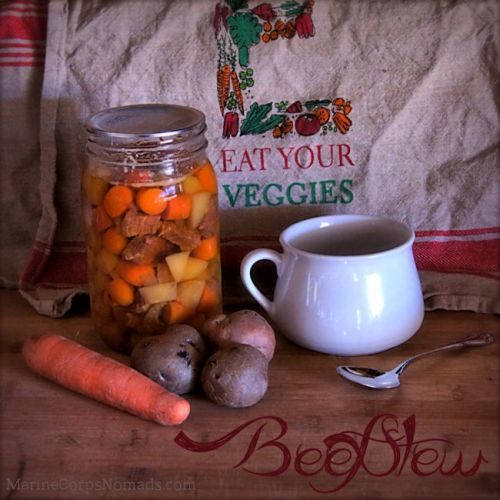
The weather is getting cooler, so it’s time to start making soups and stews. Since I have a pressure canner this year, I am able to can our stew for use later without having to freeze it. This means that it’s easy for Daddy to grab a jar of stew, warm it up, and put it in a thermos to eat for lunch.
Making beef stew at home means you can control the quality and quantity of the ingredients. This beef stew recipe was a hit with my family, and it includes canning instructions for shelf-stable storage using a pressure canner. This naturally gluten free recipe is perfect for the cool fall and winter days.
D has decided the stew needs more meat. Of course, he always wants more meat with his meals. Munchkin, on the other hand, loves all the potatoes and carrots as they are her favorite part of the stew. I think the next time that I make it I may have more meat in some jars and less in others so they can each their favorite type of stew.
I had leftover broth, so I used it to can some carrots instead of just using water.
Beef Stew Recipe
(Recipe adjusted from the Ball recipe)
Ingredients:
- 4 lbs grassfed beef stew meat cut into 1.5 inch pieces
- 1 Tbsp. coconut or olive oil
- 12 cups peeled and cubed red or yellow organic potatoes
- 8 cups “cubed” organic carrots
- 3 cups chopped organic celery
- 3 cups chopped organic white or yellow onion
- 1 1/2 Tbsp sea salt
- 2 tsp thyme (fresh if you have it)
- 1 tsp fresh cracked pepper
Directions:
- Brown meat in oil in large stock pot.
- Add vegetables and seasonings to browned meat.
- Cover meat with boiling water and bring stew to a boil. Once it boils, remove it from the heat. (You’re not completely cooking the stew as it will be cooked during the canning process.)
- Ladle hot stew into hot jars leaving a 1 inch headspace.
- Remove air bubbles. Wipe rims and adjust lids until fit is fingertip tight.
- Process filled jars in a pressure canner according to these times:
- For Pints – 1 hour and 15 minutes at 10 lbs if less than 1,000 ft OR 15 lbs if above 1,000 ft.
- For Quarts – 1 hours and 30 minutes at 10 lbs in less than 1,000 ft OR 15 lbs if above 1,000 ft.
- Start the timing process once the weighted gauge begins to jiggle.
- Once the timing process is complete, turn off the heat and let the canner completely depressurize. (Do not remove the weight until the canner is depressurized.)
- After the canner is depressurized, remove the weight and wait 10 more minutes.
- After 10 minutes, unfasten the lid and carefully remove it – lifting away from your face.
- Remove the jars with a jar lifter and place on a towel leaving at least 1 inch between the jars.
- Allow the jars to sit undisturbed to 12 to 24 hours and then check to verify they have properly sealed.

- 4 lbs grassfed beef stew meat cut into 1.5 inch pieces
- 1 Tbsp. coconut or olive oil
- 12 cups peeled and cubed red or yellow organic potatoes
- 8 cups “cubed” organic carrots
- 3 cups chopped organic celery
- 3 cups chopped organic white or yellow onion
- 1½ Tbsp sea salt
- 2 tsp thyme (fresh if you have it)
- 1 tsp fresh cracked pepper
- Brown meat in oil in large stock pot.
- Add vegetables and seasonings to browned meat.
- Cover meat with boiling water and bring stew to a boil. Once it boils, remove it from the heat. (You’re not completely cooking the stew as it will be cooked during the canning process.)
- Ladle hot stew into hot jars leaving a 1 inch headspace.
- Remove air bubbles. Wipe rims and adjust lids until fit is fingertip tight.
- Process filled jars in a pressure canner according to these times:
- For Pints – 1 hour and 15 minutes at 10 lbs if less than 1,000 ft OR 15 lbs if above 1,000 ft.
- For Quarts – 1 hours and 30 minutes at 10 lbs in less than 1,000 ft OR 15 lbs if above 1,000 ft.
- Start the timing process once the weighted gauge begins to jiggle.
- Once the timing process is complete, turn off the heat and let the canner completely depressurize. (Do not remove the weight until the canner is depressurized.)
- After the canner is depressurized, remove the weight and wait 10 more minutes.
- After 10 minutes, unfasten the lid and carefully remove it – lifting away from your face.
- Remove the jars with a jar lifter and place on a towel leaving at least 1 inch between the jars.
- Allow the jars to sit undisturbed to 12 to 24 hours and then check to verify they have properly sealed.